Lets put boomerang flow on our laptop

In the last couple of months we’ve been working on converting our cloud-native orchestration tool for workflows a.k.a. Boomerang Flow to use Tekton’s Tasks and TaskRuns. Its light, extensible and has great user experience and today we are going to install it on our own laptop. Lets see how easily we can achieve that.
If you want to find out more on what Boomerang Flow is, I invite you to browse the project home page , go to the GitHub repository or get started from the docs.
Boomerang Flow is an open-source event-driven cloud-native workflow automation tool that runs on Kubernetes and provides a no-code drag and drop editor for workflow creation. We focus first on the end-user experience and then the technical features.
If you want to try the workflow orchestration tool and you don’t necessarily want to provision a Kubernetes cluster in one of the various providers, you can still give it a go running it locally on your laptop. In this article I’ll do a hands-on exercise on an end-to-end installation of boomerang flow on a “regular” laptop. I’m running on a MacBook Pro with a 2.6 GHz Intel i7 running on 16 GB of RAM.
Here are the steps what you’ll need to do:
- First we will install a k8s cluster on the local machine and configure it’s ingress controller,
- Then we are going to quickly deploy a
mongodbinstance that is used by the boomerang flow to store its data, - Following that, we will install the boomerang flow project in the newly Kubernetes cluster on our machine,
- Finally we will activate it and give it a run.
Installing a Kubernetes cluster on the local machine
First, we will install a Kubernetes cluster on the local machine using kind, but before doing that we need to make sure we have the necessary cli tools installed on our machine: kubectl, helm and kind .
You can follow these instructions:
1a. Install kubectl locally just by following the instructions found here .
1b. Install helm locally just by following the instructions found here .
1c. Install kind locally following the instructions found here or just run:
curl -Lo ./kind https://kind.sigs.k8s.io/dl/v0.9.0/kind-darwin-amd64
chmod +x ./kind
mv ./kind /some-dir-in-your-PATH/kind
2. Now that we have kind tool installed locally we need to create a Kubernetes cluster. This will create a single node cluster and add ingress-ready label, preparing it for the ingress-controller installation. Open a terminal and paste the following snippet (which should take 1–2 minutes to create and start the cluster).
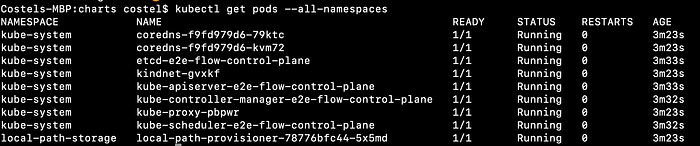
It takes about 2 minutes for all the cluster’s pods to start, so before moving to the next step make sure they are running:
3. Install ingress nginx in the cluster by running:
kubectl apply -f https://raw.githubusercontent.com/kubernetes/ingress-nginx/master/deploy/static/provider/kind/deploy.yamlThis will create a new namespace ingress-nginx and then deploy the nginx ingress controller container. Make sure the nginx controller is running, you might wait up to a minute for the pod to be ready.

3.1 Patch the nginx configuration to configure the proxy cache path. Easily done just by running:
kubectl patch configmap/ingress-nginx-controller -n ingress-nginx --type merge -p '{"data":{"http-snippet": "proxy_cache_path /tmp/nginx levels=1:2 keys_zone=authentication:10m inactive=3s;"}}'Installing a mongodb instance
Boomerang flow needs to persist its running data like teams, workflow definitions, executions and many others in a mongodb instance. Later on, the boomerang flow installation will run a Job (part of its installation) that will setup the initial state of the database.
We are going to use a Helm chart from bitnami which will simplify the installation of the database. First make sure you have the bitnami helm repository added to your local repositories and its up to date:
helm repo add bitnami https://charts.bitnami.com/bitnami
helm repo update
and then just run:
helm upgrade --version 7.8.8 --install bmrg-mongodb bitnami/mongodb --set mongodbDatabase=boomerang --set mongodbUsername=boomerangBefore moving on let’s make sure the pod is up&running.

Installing boomerang flow
Now that the heavy lifting is done we install the boomerang flow by simply adding the boomerang-io Helm chart repository to our local store and make sure it knows about the versions of boomerang flow.
helm repo add boomerang-io https://raw.githubusercontent.com/boomerang-io/charts/indexhelm repo update
Installing the boomerang flow at this moment is simply running the following command, which will install the latest helm release. You can also install previous stable releases by using the--version x.y.z(the list of versions can be seen here):
helm upgrade --version 4.9.7 --install --debug flow boomerang-io/bmrg-flow -f https://raw.githubusercontent.com/boomerang-io/charts/main/examples/flow-basic-auth-values.yamlNote: Its worth mentioning that the current installation is configuring the boomerang flow back-end microservices to request only 128MB or memory. For this exercise this is enough however if you intend in running more complex workflows make sure you increase the memory allocated to the Docker daemon to 4GB and configure the boomerang flow back-end microservices, in the provided flow-basic-auth-values.yaml file to 1GB each.
Once the installation is finished we will see the release notes. These are important because they show us how o access the tool and also how to activate it.

To get the activation code just run the instructed command. It will extract the activation code and will place it in the clipboard buffer. We will need it later after the first login when we’ll have to paste it in the UI.
kubectl get secret --namespace default bmrg-flow-secrets -o jsonpath="{.data.FLOW_OTC}" | base64 --decode | pbcopyWe might need to give it up to 2–3 minutes to allow the cluster to download the images and to start them. Next, lets open the browser and go to https://localhost/flow/apps/flow
On the login screen we need to use the following testing credentials, bmrgadmin / youll-come-a-waltzing-maltilda-with-me .

For the first time, we will need to activate the boomerang flow, using the activation code we retrieved earlier and stored in the clipboard.
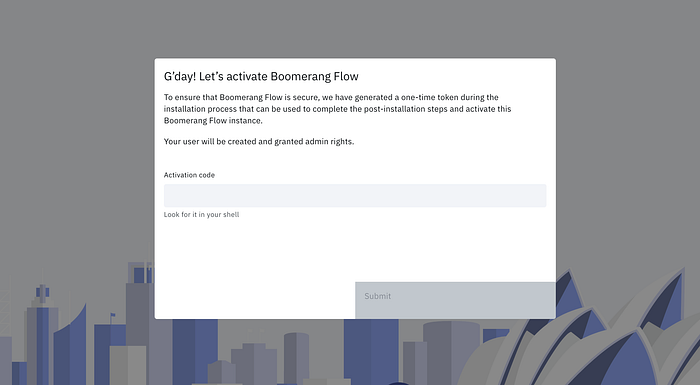
Paste in the activation code and Submit. We might need to refresh the browser page for the flow application to pick up the new settings.
Ok, so now what …
Well, in the next section we’ll test our local installation by creating and executing a workflow.
There is a dedicated section of tutorials in the public documentation that covers the integration with GitHub, Sendgrid, Box and manual approval tasks.
Testing our local installation
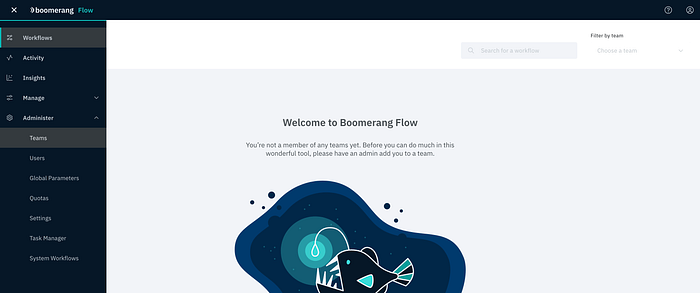
Opening the boomerang flow tool is showing us the Welcome page. The tool is based on teams and users so the very first thing we need to do is to create a team and add our own user in the team.
On the Welcome page open the top-left hamburger menu and select Administer ➲ Teams.
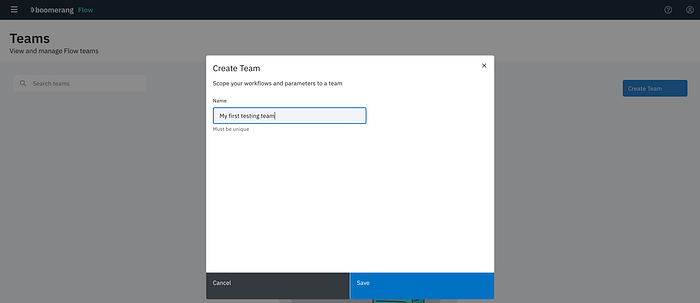
In the general Teams page press the Create Team button from the top-right side. In the modal window lets fill in the team’s name and press Save.
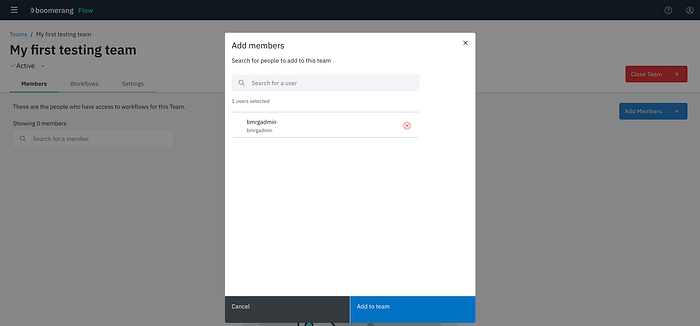
Now that we have a team created, we want to add our own user bmrgadmin to the team. Select the team and then press the Add Members button. In the modal window write the username, that is bmrgadmin, select the result and then press Add to team.
Now we can go back to the Workflows page to create a new workflow. We achieve that by opening the top-left hamburger menu and select Workflows. Since our user is part of a team, we get to see the team name, its quotas, the existing workflows as well as a button to Create a new workflow.
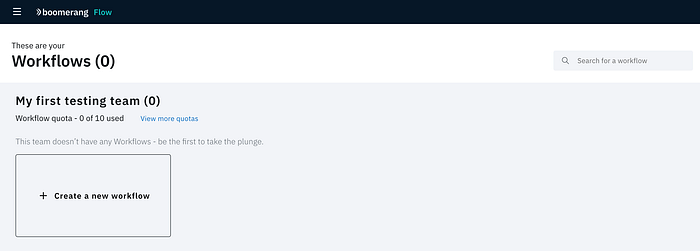
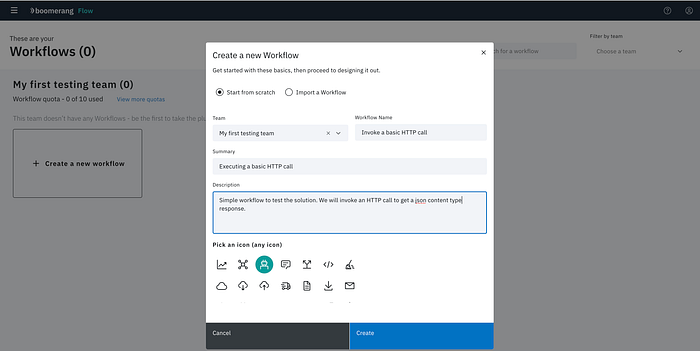
Lets Create a new workflow and fill in the details in the modal window. Press Create button.
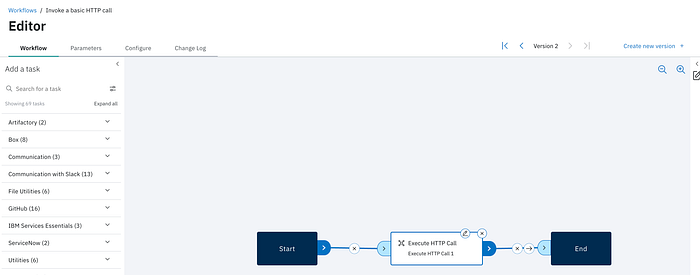
In the workflow editor we can design and configure the workflow through drag and drop actions. We can go pretty crazy with the design of a workflow using various types of predefined tasks and defining our customs ones, as long as we have a working docker image. More about this can be found in the official documentation. For now we are just going to drag & drop the Execute HTTP Call task that can be found under Utilities category.
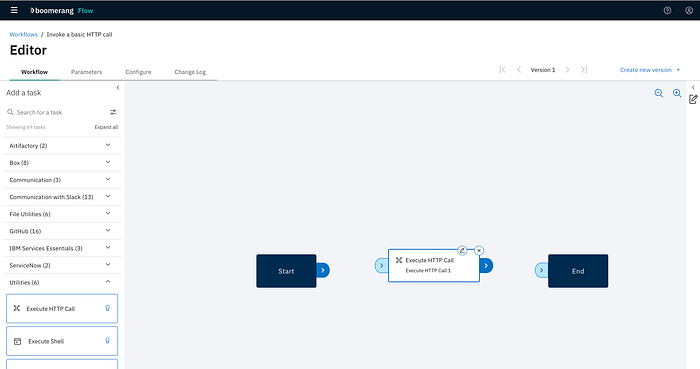
Lets configure the Execute HTTP Call task by pressing the small pencil icon on the task. We just want to make an HTTP call that would return us a json response with a 200 HTTP status. In the modal window lets update the fields with the following values and press Apply button.
URL:https://httpstat.us/200Method:GETHeaders:Accept: application/jsonContent Type:application/json- The rest of the fields can remain empty

Wire up the Start, End and the task itself by dragging a line from the previous tasks to the next one.
Once the workflow looks like the one from bellow, press the Create new version button from the top-right side to save the changes.
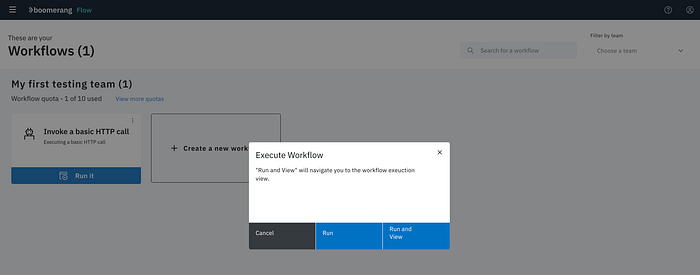
Now we can go back to the Workflows page and run the newly created workflow. Again open the top-left hamburger menu and select Workflows. Press on the Run it ➲ Run and View.
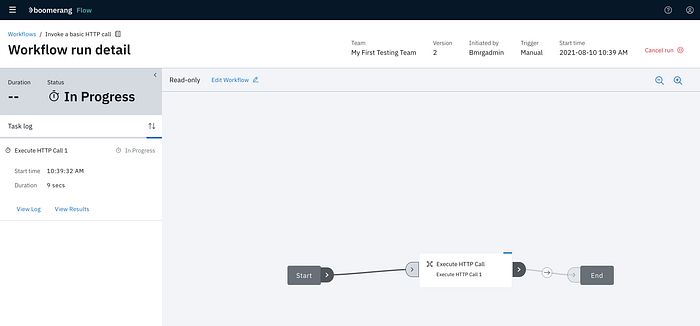
We are taken into the Workflow run detail page where we can see in real time the execution of the workflow, the logs, the results as well as cancel the run.
Note: The first execution might take longer, up to 5–10 minutes until the images are downloaded and started. The following runs will reuse the images, making the executions much faster.
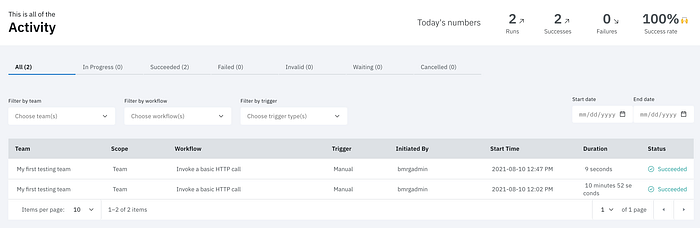
Opening the top-left hamburger menu and selecting Activity we get a view of the workflow executions, filtered by various criteria, like: status, team, workflow name and execution date.
Here it is, a cloud native workflow orchestrator on your laptop. I said in the beginning that we’ve moved the executions to Tekton’s TaskRuns. We can even check the details of the taskruns by using the tkn cli, part of the Tekton.

Cleaning up the local installation
To completely remove the installation from our laptop we just need to remove the kind cluster that we created. If you followed the instructions found here, the cluster’s name is e2e-flow or if you manually changed it during the installation it can be found easily by running:
kind get clusters
To remove the local cluster just run:
kind delete cluster --name=e2e-flow
Show your support
If you like the boomerang flow project and you find it helpful:
- ⭐️ the GitHub repository
- 💬 Follow us on Twitter
- Install the project on your own Kubernetes cluster
- 🙏 Join us and help contribute
Big shout out to my colleagues from boomerang-io team 👏 for all their hard work in building and maintaining the project: Ben, Marcus and Tyson.

